After uploading your Unbounce page template and making your necessary edits you'll be ready to publish the page.

Setting Up Your Domain within Unbounce
While you can certainly use one of the built-in Unbounce URL options, we always recommend that you integrate your pages with your company domain. This adds credibility to the page and allows for a seamless user experience.
Select the "Domains" option from the left menu
If you use Wordpress domains then you can select that option from the two choices at the top of your screen and follow the on-screen prompts
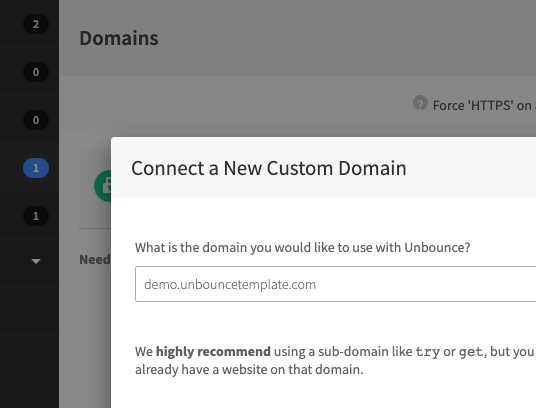
Everyone else should click "Connect a Custom Domain" at the top of the screen
Enter a subdomain you want to use for all of the landing pages. For example, demo.unbouncetemplate.com acts as our subdomain and specific landing pages then have a slug appended (which we'll address later in this article) such as demo.unbouncetemplate.com/example-page/. You must use a URL you own and ideally this is your main business URL.
Click "Connect Domain"
Click "Continue" when the Entri pop-up notification appears
Your domain will be reviewed by their system to determine the best next steps given the registrar you use
You'll then likely be prompted to log in to your domain registrar, website platform, or given on-screen instructions to follow
For the most common website platforms/builders and registrars the next steps should happen automatically after logging in
Once complete you'll see a confirmation screen. Click "Done"
Keep in mind that the domain may show up within Unbounce as available for use but does not work right away. It can take up to 48 hours for it to be fully functioning but often takes less than one hour.
Publishing Your Unbounce Landing Page
If you've already set up your domain or are using the built-in Unbounce page URLs then you're ready to publish your page and select a URL.
Navigate to your landing page within Unbounce
Click the placeholder URL at the top of the screen. When hovering you'll get a tooltip that says "Change page URL"
Select the domain you've created from the Domain Name dropdown
Enter a page path that accurately represents your page
Click "Save URL"
Click "Publish"
Click "Publish Page" when the review screen appears
You're all set and the page URL at the top of the screen is now live and active!
You can always change your URL again by following the same steps so don't worry about it being perfect or changing your mind. Just be mindful that if you page is already linked from other pages or used in ads, social posts, etc. then you'll want to update those, if possible, as they'll no longer work.
Still have questions? Reach out to our team and we'll lend a hand.
コメント